Guide to Compatible Hotends for MicroSwiss 3D Printers
Introduction to MicroSwiss Hotends
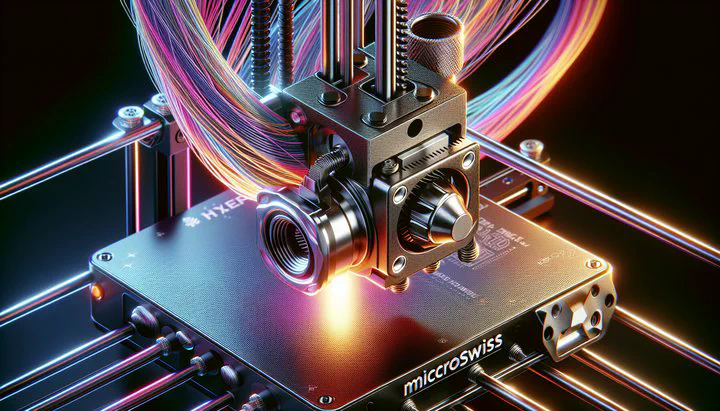
Welcome to the world of MicroSwiss hotends! These high-performance components are a must-have for 3D printing enthusiasts who want to take their projects to the next level. Known for their durability and precision, MicroSwiss hotends are especially popular among MicroSwiss Direct Drive All Metal Hotend users. If you’re looking for a suggestion for a compatible hotend for your setup, you’ve come to the right place.
MicroSwiss hotends are designed to be versatile and compatible with a wide range of 3D printers. Their all-metal construction allows them to handle higher temperatures, making them ideal for printing with various materials like PLA, ABS, and even more demanding filaments like PETG and nylon. This adaptability is one of the key benefits that draws users to the MicroSwiss brand.
One of the standout features of the MicroSwiss Direct Drive All Metal Hotend is its direct drive system. This design offers greater control over filament extrusion, resulting in smoother and more accurate prints. For anyone keen on achieving high-quality results, this is a significant advantage. Plus, the easy-to-install design makes it a favorite among both beginners and seasoned makers.
Whether you’re upgrading your existing printer or building a new one, choosing the right hotend is crucial for success. With MicroSwiss hotends, you get a blend of compatibility, performance, and ease of use. Throughout this guide, we’ll explore how to fit the MicroSwiss direct drive hotend into your setup, troubleshoot common issues, and optimize performance to ensure your 3D prints are nothing short of amazing.
Choosing the Right Hotend for Your MicroSwiss Setup
Selecting the perfect hotend for your MicroSwiss setup is essential for achieving top-notch 3D printing results. When seeking a suggestion for a compatible hotend for your MicroSwiss printer, there are a few key factors to consider: material compatibility, performance capabilities, and ease of integration into your existing setup.
First, think about the materials you plan to use. If you frequently print with standard filaments like PLA or ABS, most MicroSwiss hotends will work just fine. However, if you’re planning to experiment with advanced materials like PETG, nylon, or carbon fiber-infused filaments, you’ll need a hotend that can handle higher temperatures. The MicroSwiss Direct Drive All Metal Hotend is an excellent choice for these demanding materials as it withstands high heat without degrading.
Next, consider the performance features you need. If precision and smoothness are your top priorities, look for a hotend with a direct drive system. This setup provides better control over filament extrusion, which is especially useful for detailed prints. Many MicroSwiss Direct Drive All Metal Hotend users praise its ability to produce consistent and high-quality results, making it a go-to option for those who value accuracy.
Finally, ensure that the hotend you choose integrates easily into your current printer. Some hotends are designed to be universally compatible, while others may require specific adapters or modifications. Check that the hotend will fit the MicroSwiss direct drive system without any issues, and verify whether any additional components are needed for installation. By considering these factors, you can confidently choose a hotend that will enhance your 3D printing experience and meet your creative needs.
Installation Tips and Best Practices
Getting your MicroSwiss hotend installed correctly is key to unlocking its full potential. Follow these step-by-step instructions to ensure a smooth and successful installation. With the right setup, you’ll be printing like a pro in no time!
Step 1: Gather Your Tools and Materials
Before you start, make sure you have all the necessary tools and components. You’ll need a set of hex keys, a wrench for tightening the nozzle, and any screws or brackets that came with your MicroSwiss Direct Drive All Metal Hotend. It’s also a good idea to have a clean workspace to keep everything organized.
Step 2: Remove the Old Hotend
If you’re replacing an old hotend, carefully detach it from your 3D printer. Be sure to turn off the printer and let it cool down completely to avoid burns. Unscrew the hotend carefully, making sure not to damage any wires or connectors. Keep the screws handy, as you may need them for the new installation.
Step 3: Install the New Hotend
Now, it’s time to fit the MicroSwiss direct drive hotend. Align the new hotend with the mounting points on your printer. Secure it using the screws and brackets provided. Double-check that everything is aligned properly before tightening the screws. Remember, tightening the nozzle is crucial to prevent leaks and ensure optimal performance. Use your wrench to make sure the nozzle is snug but be careful not to overtighten, which could damage the threads.
Step 4: Reconnect Wires and Calibrate
Once the hotend is in place, reconnect any wires or connectors. Make sure they’re secure and correctly positioned. After that, turn on your printer and calibrate it according to the manufacturer’s instructions. This might involve adjusting the bed level and checking the filament feed.
Step 5: Test Your Installation
With everything set up, perform a test print to ensure the hotend is functioning correctly. If you notice any issues, such as inconsistent extrusion or filament jams, double-check your installation and make sure all components are tight and properly aligned. Addressing any problem with your all metal hotend now will save you time and frustration later.
By following these best practices, you can confidently install your MicroSwiss hotend and enjoy high-quality prints. Proper installation not only enhances performance but also extends the lifespan of your hotend, making it a wise investment for any 3D printing enthusiast.
Troubleshooting Common Issues
Even with the best equipment, you might sometimes face a problem with your all metal hotend. Don’t worry; most issues are easy to fix with a little patience and know-how. Here, we’ll tackle some common problems that MicroSwiss Direct Drive All Metal Hotend users encounter and how to solve them.
Issue 1: Filament Jams
Filament jams are a frequent headache for 3D printing enthusiasts. If you find that your filament isn’t flowing smoothly, first check that the nozzle is clean and free of debris. Residue can build up over time, especially if you’re using abrasive materials. To fix this, you can perform a cold pull. Heat the hotend to the recommended temperature for your filament, then cool it slightly and gently pull the filament out. This should help clear any blockages.
Issue 2: Inconsistent Extrusion
Inconsistent extrusion can ruin a good print. If your layers look uneven, the problem might be related to the hotend temperature or the quality of your filament. Make sure your printer is set to the correct temperature for your specific filament type. Also, check that the filament is dry, as moisture can lead to poor extrusion. If the issue persists, inspect the extruder gears for wear and tear, as these might need tightening or replacement.
Issue 3: Leaks from the Nozzle
If you notice plastic leaking from around the nozzle, it might be due to improper tightening. Remember, tightening the nozzle correctly is crucial. To fix this, first heat the hotend to soften any plastic around the threads. Then, carefully tighten the nozzle with a wrench. Be gentle to avoid damaging the threads but ensure it’s snug enough to prevent leaks.
Issue 4: Temperature Fluctuations
Temperature fluctuations can affect print quality. If your hotend’s temperature isn’t stable, check the thermistor and heater cartridge connections. Loose connections can lead to erratic readings. Secure these components and ensure they are properly seated. If the problem continues, consider replacing the thermistor or heater cartridge.
By understanding these common issues and how to address them, you can keep your MicroSwiss hotend running smoothly. With a bit of troubleshooting, you’ll avoid downtime and get back to creating amazing prints. Remember, regular maintenance and careful installation play a big role in preventing these problems from occurring in the first place.
Optimizing Performance of Your MicroSwiss Hotend
To get the best out of your 3D printing projects, optimizing the performance of your MicroSwiss hotend is essential. Whether you’re a seasoned maker or just getting started, these tips will help ensure that your prints are high-quality and consistent.
Tip 1: Regular Maintenance
To keep your hotend in top shape, regular maintenance is key. Frequently inspect your hotend for any wear and tear, especially if you print often or use abrasive materials. Clean the nozzle regularly to prevent clogs and jams. A clean nozzle ensures smooth filament flow, which is crucial for achieving high-quality prints. Also, make sure all screws and components are tight to avoid any misalignments or leaks.
Tip 2: Temperature Calibration
Accurate temperature settings are vital for optimizing performance. Each filament type has a specific temperature range that works best. For example, PLA typically prints well between 190-220°C, while materials like PETG or nylon require higher temperatures. Make sure your printer is set to the correct temperature for the filament you’re using. This helps avoid issues like stringing or warping, ensuring your prints come out looking great.
Tip 3: Use Quality Filaments
The quality of your filament can greatly affect your print results. Poor-quality filaments can lead to clogs, uneven layers, and other printing issues. Invest in high-quality filaments from reputable brands to ensure consistent extrusion and better overall print quality. If you notice any problems with your all metal hotend during a print, it might be worth checking if your filament is the culprit.
Tip 4: Optimize Printing Speeds
Finding the right balance between speed and quality is important. Printing too fast can lead to poor layer adhesion and surface defects, while printing too slowly can increase print time unnecessarily. Experiment with different speeds to find the optimal setting for your printer and the materials you’re using. The MicroSwiss Direct Drive All Metal Hotend users often find that a moderate speed offers the best balance between quality and efficiency.
Tip 5: Fine-Tune Your Slicer Settings
Your slicer software plays a big role in how well your prints turn out. Take the time to fine-tune settings such as layer height, infill density, and print speed. These adjustments can make a big difference in the final output. Additionally, double-check your settings for tightening the nozzle and ensure your slicer is set up to accommodate any unique features of your MicroSwiss hotend.
By following these optimization tips, you can make the most of your MicroSwiss hotend and enjoy the benefits of high-quality 3D prints. Whether you’re creating intricate models or large prototypes, a well-optimized hotend will help you achieve the best results possible. Happy printing!
Conclusion
In conclusion, choosing the right hotend and optimizing its performance can greatly enhance your 3D printing experience. With the MicroSwiss Direct Drive All Metal Hotend, you have a reliable and versatile option that meets the needs of both beginners and experienced makers. By following the installation and troubleshooting tips provided, you can ensure your prints are of the highest quality. Don’t hesitate to reach out to the community for support and share your successes with others. Together, we can continue to innovate and push the boundaries of what’s possible with 3D printing. Happy printing, and may your projects be successful!