First Time Working with EVA Foam- Tips and Tricks for Beginners
Getting Started with EVA Foam
Welcome to the exciting world of EVA foam! If this is your first time working with EVA foam, you’re in for a fun adventure. EVA foam, short for Ethylene-Vinyl Acetate foam, is a versatile material that’s perfect for making props and costumes, especially if you’re diving into the world of cosplay. Its popularity among beginners is no accident—EVA foam is lightweight, easy to cut, and wonderfully flexible. These properties make it an ideal choice for crafting unique and imaginative pieces.
So, why is EVA foam such a favorite for those new to prop-making? One of the biggest reasons is its lightweight nature. This makes it easy to carry and wear, which is essential when you’re creating costumes or props that you might wear for hours at a time. It’s also easy to shape and cut, allowing you to bring your designs to life without needing advanced tools or techniques. Whether you’re crafting a sword, a helmet, or any other prop, EVA foam is forgiving and adaptable, letting you experiment and learn as you go.
Another reason EVA foam is a go-to material is its flexibility. It bends and moves with ease, which is fantastic when you need parts of your costume to have a bit of give, like armor pieces that need to fit snugly around your body. Plus, EVA foam can be easily painted and detailed, allowing you to add those finishing touches that make your props stand out. As a beginner, you’ll find that working with EVA foam is both rewarding and educational, helping you build foundational skills in prop-making.
As you start your journey with EVA foam, remember that it’s all about having fun and exploring your creativity. Whether you’re preparing for a costume contest at your office next week or making something just for the experience, EVA foam is an excellent starting point. Embrace the learning process, experiment with techniques, and enjoy the satisfaction of crafting something with your own hands. You’re on your way to creating something amazing, and EVA foam is here to help you every step of the way.
Tackling Common Challenges
Diving into your first time working with EVA foam can be exciting, but it’s not without its challenges. One of the most common issues beginners face is dealing with seams. When you’re crafting props, seams are the lines where pieces of foam come together, and if not handled properly, they can make your project look less polished. But don’t worry—there are ways to tackle these challenges and make your EVA foam creations look fantastic.
Many beginners have made a real mess with the seams, especially when they’re not sure how to join pieces smoothly. To avoid this, ensure you’re cutting your foam with sharp tools to get clean edges. When gluing pieces together, take your time and align them carefully. If you notice gaps or unevenness, don’t panic! One effective trick is to sand the seams more harshly. Using sandpaper, gently smooth out the edges until they blend seamlessly. This technique can make a significant difference in the final appearance of your prop.
Another challenge is knowing when and how to apply heat. EVA foam is heat-sensitive, which means you can use a heat gun to shape it and smooth out seams. However, too much heat can warp your foam or create unwanted textures. Practice on scrap pieces to get a feel for how the foam reacts to heat. This practice can help you control the material better and avoid mistakes on your main project.
Patience is key when dealing with these challenges. For the very first time I dared to make an EVA foam prop, I learned that taking things slow and steady is the best approach. Pay attention to details and don’t rush the process. With practice, you’ll discover that even the most troublesome seams can be mastered, leading to a smooth and professional-looking prop.
Remember, every challenge is an opportunity to learn. Whether you’re preparing for that costume contest at your office next week or simply experimenting for fun, overcoming these common hurdles will boost your confidence and skills. Keep experimenting, and soon you’ll be creating EVA foam props like a pro!
Creating Your First EVA Foam Prop
Now that you’re familiar with the basics, it’s time to dive into creating your very own EVA foam prop! This process might seem a bit daunting at first, especially if it’s the very first time I dared to make an EVA foam prop, but don’t worry—it’s easier than you think with a bit of guidance.
Step-by-Step Guide:
-
Choose a Simple Design: Start with something manageable, like a small shield or a basic mask. Sketch your design on paper and then trace it onto the EVA foam with a marker.
-
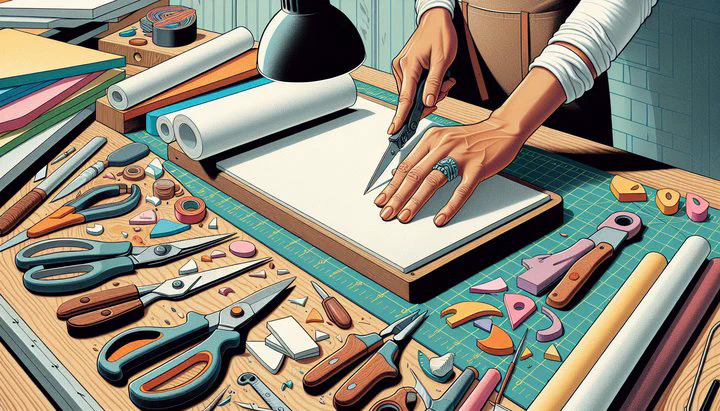
Cut Out the Pieces: Use a sharp utility knife for clean and precise cuts. Remember, a sharp blade is your best friend here!
-
Assemble Your Prop: Use a strong adhesive, such as contact cement, to glue the pieces together. Apply the glue carefully and press the pieces until they’re secure. If seams are noticeable, don’t worry—sanding the seams more harshly will help blend them in.
-
Add Color: Paint your prop using acrylic paints. Apply in thin layers, letting each one dry before adding the next. This will keep your colors bright and smooth.
-
Seal Your Creation: Finish with a clear sealant for a shiny, durable finish. This step protects your work and gives it a professional look.
Remember, creating your first EVA foam prop is a rewarding experience. With patience and practice, you’ll soon be crafting more complex and stunning pieces. Enjoy the process and celebrate your achievements—each project is a step towards mastering the art of EVA foam crafting!
Preparing for a Costume Contest
So, you’ve made your first EVA foam prop and you’re ready to showcase it. But what if the costume contest at your office is next week? Don’t worry! With some smart planning and time management, you can make sure your creation is contest-ready.
First, create a timeline. Break down your tasks into small, manageable steps. Write down what you need to do each day leading up to the contest. This helps you stay organized and ensures nothing gets left to the last minute. Make sure to include time for unexpected fixes or improvements.
Next, focus on the details that will make your prop stand out. Think about adding extra touches, like intricate paintwork or small accessories. These can make a big difference in how your prop is perceived. If you’ve made a real mess with the seams, now’s the time to fix it. Spend some time sanding the seams more harshly to make them smooth and professional-looking.
Time management is crucial when facing a deadline. Set aside specific times each day to work on your project without distractions. This could be early morning or right after dinner—whatever works best for you. Stick to your schedule and you’ll keep making progress without feeling rushed.
Don’t forget to test your prop before the big day. Wear it, move around, and make sure it’s comfortable and durable. If something feels off, adjust it now. It’s better to find and fix problems ahead of time than to deal with them on the contest day.
Finally, remember to have fun. Preparing for a costume contest should be an enjoyable experience. Celebrate the hard work you’ve put into your prop. Whether you win or not, you’ve learned and created something amazing. Good luck, and enjoy the contest!
Finishing Touches and Final Thoughts
You’ve come a long way in your journey with EVA foam, and now it’s time to add those finishing touches that will make your creation shine. Whether you’re preparing for a costume contest at your office next week or simply want to complete your project with style, these final steps are key to ensuring your EVA foam prop looks polished and professional.
Start by giving your prop a careful check. Look for any seams that might still be visible. If you’ve made a real mess with the seams in some areas, take a moment to sand the seams more harshly. This will help smooth out any rough spots and give your prop a seamless appearance. It’s these small details that can make a big difference in the overall look of your project.
Next, consider the paint job. A well-painted prop can really stand out. Use high-quality acrylic paints and apply them in thin, even layers. Remember to let each layer dry completely before adding the next. This patience will ensure your colors are vibrant and your details crisp. If you’re feeling adventurous, try adding shading or highlights to give your prop more depth and realism.
Once you’re satisfied with the paint, it’s time to seal your work. A clear sealant will protect your paint job and add a nice finish to your prop. It also helps to make your prop more durable, which is especially important if it will be handled a lot, like at a costume contest. Apply the sealant in a well-ventilated area and allow it to dry thoroughly.
As you put on these final touches, take a moment to appreciate how far you’ve come. From the very first time you dared to make an EVA foam prop, you’ve learned and grown with each step. Remember, each project is an opportunity to improve and express your creativity. Celebrate your achievements and use the skills you’ve gained for future projects.
Finally, don’t forget the most important part—having fun! Whether you’re showcasing your prop at an event or displaying it proudly at home, take pride in your work. You’ve unlocked new skills and crafted something unique with your own hands. Keep experimenting and pushing your boundaries. The world of EVA foam crafting is vast and full of possibilities, and you’re just getting started!
Related
- How to Bind Fabric Pieces Together- A Comprehensive Guide
- Utilizing a 1 Ohm Resistor with Festo Multi-Pin Plugs for Enhanced Circuit Performance
- Effective Techniques to Maintain the Shape of Breast Cups
- Exploring Flexible Materials for Wing Props
- How to Find and Replace the Eccentric Bushing in a DJ-15 Delta Jointer