Einscan-SE Noise Reduction Techniques
Overcoming Noise Challenges with Your Einscan-SE
Have you ever tried to scan an object with your Einscan-SE, only to find that the results are a bit… noisy? You’re not alone! Many users face this challenge, but the good news is there are effective techniques to reduce this noise and achieve clearer, more accurate scans. Whether you’re just starting or have been scanning for a while, mastering these Einscan-SE noise reduction techniques will help you get the most out of your 3D scanner. Let’s dive into some simple strategies to enhance your scanning results!
Understanding Einscan-SE and Its Noise Challenges
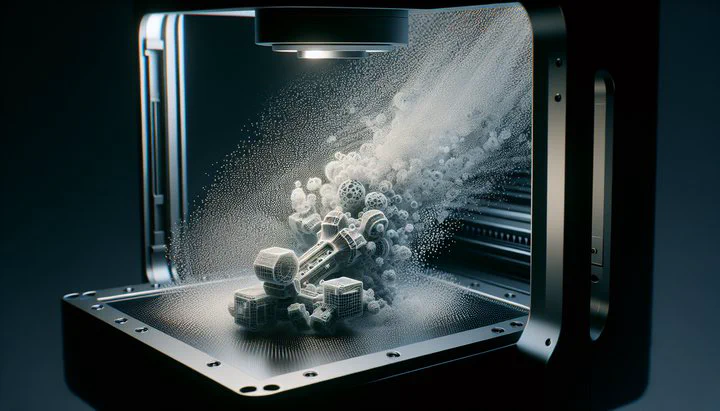
The Einscan-SE 3D scanner is a popular tool among makers and professionals for its ability to capture detailed digital models of real-world objects. This scanner is known for being user-friendly and offering great performance at an affordable price. However, like many 3D scanners, the Einscan-SE can encounter some common challenges, especially related to noise. Noise in scanning refers to unwanted artifacts or inconsistencies that can appear in the scan data, making it difficult to achieve high-quality results.
Noise issues can arise from various sources. For instance, if the environment around the scanner has too much light, or if the scanner settings aren’t adjusted properly, the scans may end up with speckles or distortions. These artifacts can make the scanned model look rough or inaccurate, which is not ideal when you are aiming for precision. Reducing noise is crucial because it helps you get cleaner and more accurate scans, which are essential for any project that requires precise measurements or detailed digital representations.
Addressing noise challenges involves understanding why they occur and knowing the steps to minimize them. One common cause of noise is improper calibration board alignment, which can lead to errors in how the scanner interprets the object’s dimensions. Additionally, when scanning objects of varying sizes, the scanner might struggle with object size indifference techniques, leading to further inconsistencies. Therefore, mastering these aspects is vital in reducing noise and improving the quality of your scans.
By focusing on Einscan-SE noise reduction techniques, you can significantly enhance the accuracy and reliability of your scans. This not only helps in creating better digital models but also saves time by reducing the need for extensive post-processing. Whether you’re a beginner or an experienced user, understanding these challenges and how to overcome them is key to unlocking the full potential of your Einscan-SE scanner.
Calibration Board Alignment Techniques
One key step to achieving clean and accurate scans with your Einscan-SE 3D scanner is mastering the calibration board alignment. This process is crucial because it ensures that the scanner correctly interprets the dimensions and details of the object you are scanning. Proper alignment helps minimize errors and reduce noise that can otherwise distort your scan data.
The calibration board plays a vital role in the scanning process. It acts as a reference point that helps the scanner understand the spatial relationships and scale of the object you’re working with. To begin, make sure your calibration board is placed on a flat, stable surface. Any tilt or movement can throw off the accuracy of the scan. The board should be positioned so that it is fully visible to the scanner, with no obstructions blocking the view.
To align the calibration board correctly, follow these steps:
-
Position the Scanner: Place your Einscan-SE at the recommended distance from the calibration board, ensuring it captures the entire board within its field of view.
-
Check for Level: Use a level tool to ensure the calibration board is perfectly horizontal. Even a slight angle can introduce errors.
-
Adjust the Scanner Settings: Access your scanner software and select the calibration mode. Follow the on-screen prompts to adjust the scanner settings, ensuring the software recognizes the calibration board correctly.
-
Perform the Calibration: Once everything is set, initiate the calibration process. The scanner will take a series of images to establish a baseline for accurate scanning.
Properly aligning the calibration board is a crucial step toward reducing noise and enhancing scan accuracy. When done correctly, it significantly lowers the risk of scan data noise, ensuring your digital models are as precise as possible. With practice, this process becomes quicker and more intuitive, allowing you to focus on capturing high-quality scans with ease.
Object Size Indifference Techniques
When using the Einscan-SE 3D scanner, you might notice that scanning objects of different sizes can introduce unwanted noise into your scans. This is because the scanner’s settings and positioning might not be automatically optimized for every object’s dimensions. To tackle this, you can use object size indifference techniques to ensure consistent scan quality, regardless of the object’s size.
One common challenge is that smaller objects may not fill the scanner’s view completely, while larger objects might exceed its field of view. Both situations can lead to noise and inaccuracies in the scan data. To address these issues, start by adjusting the scanner settings to match the object’s size. For smaller items, you can zoom in or bring the scanner closer to the object to capture more detail. For larger items, consider capturing multiple scans from different angles and then stitching them together using the scanner software.
Positioning is another key factor. Aim to center the object within the scanner’s view to minimize distortion. If the object is small, use a pedestal or stand to elevate it, ensuring it stays within the optimal scanning range. For larger objects, you might need to rotate the object or move the scanner around to capture all sides. This approach helps maintain accuracy and reduces the risk of noise.
Finally, use the scanner’s software to fine-tune the settings based on the object’s material and surface. Some surfaces reflect light differently, which can cause additional noise. Adjusting the lighting settings or applying a light powder to shiny surfaces can help the scanner capture more reliable data.
By mastering these object size indifference techniques, you can significantly reduce noise in your scans, leading to clearer and more precise digital models. These strategies not only improve the quality of your work but also enhance your overall scanning experience, making it easier to handle a wide range of objects with your Einscan-SE scanner.
Scan Data Noise Reduction Strategies
After capturing your scans with the Einscan-SE 3D scanner, you might still encounter noise in the scan data. This noise can make your digital models look rough or inaccurate, but don’t worry—there are effective strategies to reduce it. By using scan data noise reduction techniques, you can clean up your scans and achieve smoother, more precise results.
One of the first steps in reducing scan noise is to use software tools designed for this purpose. Many scanning software packages come with built-in features that help clean up noise. These tools can automatically detect and remove speckles or unwanted artifacts from your scan data. Look for options like “noise reduction” or “smoothing” in your scanner’s software and experiment with the settings to find what works best for your specific scan.
It’s also helpful to use a process called post-processing to enhance your scan data. This involves editing the scan in a 3D modeling program to manually remove noise. Programs like MeshLab or Blender allow you to refine the mesh, fill in holes, and smooth out rough areas. These adjustments can make a big difference in the quality of your final model. Take your time with this step to ensure your digital representation is as accurate as possible.
Another useful technique is to adjust the resolution settings of your scans. Lowering the resolution can sometimes help reduce noise, as it simplifies the data and removes small, unwanted details. However, be careful not to lose important details in the process. It’s a balancing act, so try different settings to see which one provides the best results without compromising on the quality you need.
By applying these scan data noise reduction strategies, you can greatly improve the clarity and accuracy of your 3D models. Whether you’re a beginner or an experienced user, these techniques will help you unlock the full potential of your Einscan-SE scanner, ensuring your projects are both impressive and precise. Remember, practice and patience are key, so keep experimenting with different methods until you achieve the perfect scan.
Using Fine Lacquer Primer for Enhanced Scanning
When working with the Einscan-SE 3D scanner, achieving a high-quality scan can sometimes be challenging due to surface noise. One effective technique to improve scanning results is the use of a fine lacquer primer. This method helps reduce surface noise, resulting in clearer and more detailed scans.
Applying a fine lacquer primer to your object creates a uniform surface that minimizes reflections and inconsistencies. This is especially helpful when scanning objects with shiny or transparent surfaces, which can often confuse the scanner and introduce noise. By reducing these reflections, the scanner can capture more accurate data, leading to a cleaner digital model.
Here’s how you can apply the fine lacquer primer for the best results:
-
Choose the Right Primer: Select a fine lacquer primer that is compatible with the material of your object. Make sure it’s a light color, as darker colors can absorb more light and complicate the scanning process.
-
Prepare the Object: Clean your object to remove any dust or debris. This ensures that the primer adheres properly and creates a smooth surface for scanning.
-
Apply the Primer Evenly: Use a spray can to apply the primer in thin, even coats. Hold the can about 6-8 inches from the object and move it in a steady, sweeping motion. Allow each coat to dry completely before applying the next. Typically, two to three coats are sufficient.
-
Let It Dry: After applying the final coat, allow the primer to dry thoroughly. This step is crucial, as it ensures the primer forms a solid, stable surface.
Using a fine lacquer primer can greatly enhance the quality of your scans by providing a consistent surface for the scanner to interpret. This technique is especially valuable for complex or textured objects, where reducing surface noise is critical. With practice, you’ll find that this extra step can significantly improve the accuracy and detail of your 3D models, making your projects more successful and satisfying. Don’t forget to experiment with different primers and application methods to find the perfect combination for your specific scanning needs.
Final Thoughts and Next Steps
Now that you’re equipped with these Einscan-SE noise reduction techniques, you can confidently tackle even the trickiest scanning projects. Whether you’re a hobbyist or a professional, these strategies will help you produce cleaner, more accurate digital models. Remember, practice makes perfect, so keep experimenting with different methods to refine your skills.
If you’re eager to learn more, check out other guides on MakerTechGuides. Join our community forums to share your experiences and learn from fellow makers. Happy scanning!
Related
- Effectively Managing TIA Software Changes with VM Snapshots
- Mastering Auto-Complete with Shared VarSets in FreeCAD
- Troubleshooting Flashforge Adventurer 4 Printing Issues
- Troubleshooting Issues When Moving ViewME Project Folder to OneDrive
- Mastering Macros in FreeCAD for Object Copying with Internal Names