Best Software to Feature Align Multiple STL Files
Introduction to Feature Alignment of STL Files
Welcome to the world of 3D modeling, where STL files play a big role! STL, which stands for “Stereolithography,” is a file format used to describe the surface shape of 3D objects. It’s a favorite among the 3D printing community because it helps turn digital designs into real-life creations. However, one common challenge is when features in these STL files don’t line up correctly. This is where feature alignment becomes crucial.
Feature alignment means making sure all parts of your model fit together just right. Imagine trying to build a puzzle where the pieces don’t quite match up. It’s frustrating, right? Misaligned features can lead to a 3D print that doesn’t look or work the way you planned. Whether you’re a hobbyist building a new gadget or a professional designing complex parts, getting those features aligned can make a huge difference in your work.
For both hobbyists and professionals, understanding how to align features in STL files is essential. It ensures that your 3D prints are accurate and functional. In digital fabrication, where precision is key, mastering feature alignment can save you time, materials, and effort. Throughout this guide, we’ll explore the best software to feature align multiple STL files, providing practical advice to help you tackle these challenges head-on.
Automatic Feature Alignment of STL Files
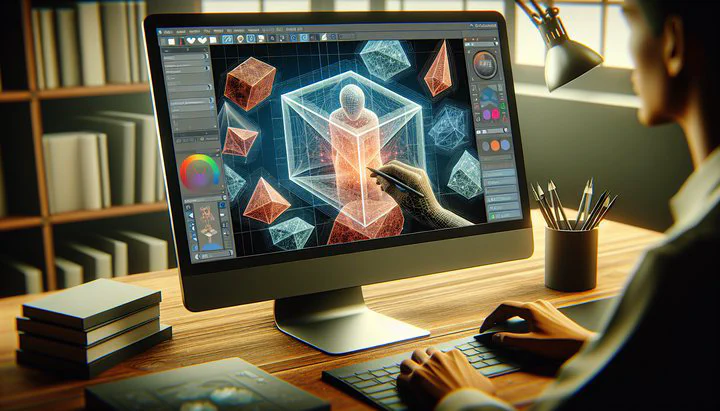
In the world of 3D printing, getting your models to fit together perfectly can be tricky. Luckily, there are amazing software tools designed to help with automatic feature alignment of STL files. These tools can save you a lot of time and make your projects look just right.
One popular choice is MeshLab, which is both powerful and free. It offers automatic alignment features that are great for beginners and experts alike. MeshLab can quickly align multiple STL files, making it a favorite for those who need a simple, yet effective solution. However, it can be a bit tricky to master at first, so patience is key.
Another strong contender is Geomagic Control X. This software is known for its precision and ease of use. It’s perfect for professionals who need reliable results. Geomagic Control X effortlessly handles complex alignments, and its user-friendly interface makes it accessible even if you’re not a tech wizard. The downside is that it’s a costlier option, but the investment can pay off with high-quality results.
For those looking for something versatile and widely compatible, Autodesk Fusion 360 is a fantastic option. It offers robust tools for automatic feature alignment and integrates smoothly with different 3D printing setups. One of its pros is the community support, where users share tips and tricks to get the most out of the software. However, because it’s such a comprehensive tool, it might take some time to explore all its features.
Automatic alignment is especially beneficial in situations where you have multiple parts that need to fit together seamlessly. This can be crucial when you’re working on detailed projects like mechanical parts or intricate designs. By using the best software to feature align multiple STL files, you ensure your projects not only look great but also function well.
Manual Alignment Techniques for STL Files
Sometimes, automatic tools just aren’t enough, and you need to take matters into your own hands. That’s where learning how to manually align multiple STL files comes in handy. While it might sound challenging, manual alignment gives you full control over your 3D models, allowing for precision and customization that automatic methods might miss.
To start manually aligning STL files, one effective tool is Blender. It’s a powerful, free software that lets you manipulate 3D models with precision. Here’s how you can do it:
- Import your STL files into Blender. You’ll see each file as a separate object.
- Use the move, rotate, and scale tools to adjust these objects until they align perfectly.
- Remember, patience and a steady hand make all the difference here!
Another useful software is TinkerCAD, which is user-friendly and works well for simpler projects. Although it doesn’t offer as many advanced features as Blender, TinkerCAD is great for beginners who need to manually align multiple STL files without getting overwhelmed. Simply import your files and use the intuitive drag-and-drop interface to line everything up. It’s like playing with digital building blocks!
Manual alignment is essential when dealing with custom or complex shapes that don’t fit standard patterns. For example, if you’re creating a personalized gadget or a unique art piece, you might find that automatic tools can’t handle the nuances of your design. In these cases, taking the time to manually adjust your models ensures that every detail is just right.
While manual alignment can be more time-consuming, it’s incredibly rewarding. You get to see your project come together piece by piece, knowing that every adjustment is tailored to your specific needs. By mastering how to manually align multiple STL files, you’ll gain valuable skills that enhance your 3D printing projects and elevate your digital creations.
Converting Aligned Scans to Mesh
Once you’ve aligned your STL files, the next step is to transform these aligned scans into a single, cohesive mesh. This process is crucial because it prepares your model for 3D printing or further digital manipulation. Let’s dive into how you can convert aligned scans to mesh effectively.
The first tool to consider is Meshmixer, a free and user-friendly software that excels at merging multiple STL files into a single mesh. Start by importing your aligned STL files into Meshmixer. Use the “Combine” feature to join them into one object. Once combined, you can use the “Remesh” tool to ensure your new mesh is smooth and ready for printing. Meshmixer is great for beginners because of its simple interface and robust community support.
Another excellent option is 3D Builder, which comes pre-installed on Windows PCs. It’s particularly useful for those new to 3D modeling. After aligning your scans, simply open them in 3D Builder, and use the “Merge” function to create a unified mesh. The software will automatically take care of minor overlaps and gaps, making it a convenient choice for straightforward projects.
For more advanced users, Geomagic Wrap offers powerful tools for converting aligned scans to mesh. It provides precise control over the merging process, ensuring that your final mesh maintains high-quality details. Geomagic Wrap is ideal for complex models that require meticulous attention to detail. Although it’s a premium software, the investment can be worth it for professionals who need top-tier results.
Converting your aligned scans into a mesh is an important step in the 3D modeling process. It ensures that your model is solid and ready for printing, preventing errors that can occur if the files remain separate. By learning how to convert aligned scans to mesh, you enhance your ability to create reliable and impressive 3D prints. Whether you’re a hobbyist refining your skills or a professional seeking precision, mastering this process is key to successful digital fabrication.
Aligning Multiple Scan Pointclouds
When working with 3D models, you might encounter something called scan pointclouds. These are collections of data points that represent the surface of an object. Before you can create a unified 3D model, you need to align multiple scan pointclouds. This step is crucial for ensuring your final model is accurate and ready for 3D printing.
To begin, it’s important to understand what scan pointclouds are. Imagine taking a bunch of tiny dots and arranging them to form the shape of an object. That’s essentially what a pointcloud is—a detailed map of an object’s surface. When you have multiple scans of the same object from different angles, you need to align these pointclouds to create a complete picture.
One popular tool for this task is CloudCompare, which is free and highly effective for aligning scan pointclouds. Start by importing your pointclouds into the software. Use the “Align” tool to match up the overlapping sections of your scans. CloudCompare’s intuitive interface makes it easier to see how well your pointclouds align, allowing you to make precise adjustments.
Another option is Autodesk ReCap, which is designed for handling large pointcloud datasets. It offers powerful alignment tools and is particularly useful for professionals working with complex models. To align your pointclouds in ReCap, import them and use the “Registration” feature to automatically align the scans. The software’s advanced algorithms help ensure a high level of accuracy.
Aligning scan pointclouds can be challenging due to variations in scan quality or environmental conditions during scanning. It’s common to face issues like noise (unwanted points) or misalignment. To overcome these challenges, focus on using high-quality scans and take advantage of tools that offer noise reduction and fine-tuning options.
By mastering how to align multiple scan pointclouds, you improve your ability to create detailed and accurate 3D models. This skill is valuable whether you’re working on a personal project or a professional job. Understanding the process and challenges involved helps you produce better results and enhances your digital fabrication capabilities.
Conclusion
Aligning STL files and scan pointclouds is a crucial step in creating accurate and functional 3D models. Whether you’re using automatic software solutions or manually adjusting your designs, mastering these techniques can save you time and enhance the quality of your work. We encourage you to experiment with the software tools mentioned and share your experiences or questions in the comments section. Remember, the world of 3D printing is full of learning opportunities, and each project brings new challenges and rewards!