Expert Recommendations for 3D Printer Model Building
Practical Recommendations for Successful 3D Printer Model Building
Are you ready to take your 3D printer model building to the next level? Whether you’re just starting out or looking to refine your skills, understanding the tools and techniques at your disposal is essential. This guide provides practical recommendations to help you choose the right technology, manage costs, and achieve stunning results.
Understanding Stereolithography vs Fused Deposition Modeling
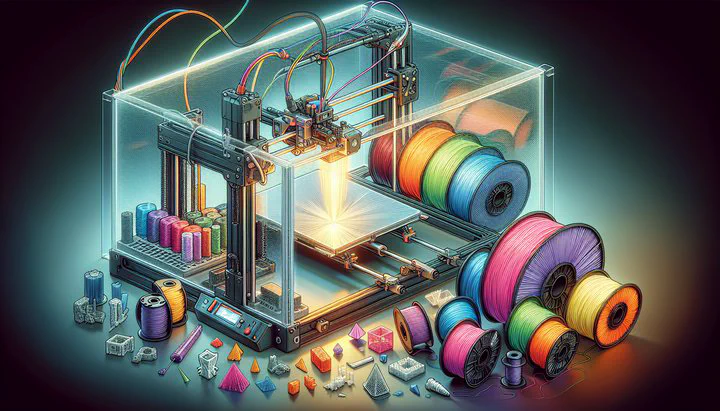
When diving into 3D printer model building, it’s important to understand the different technologies available. Two of the most popular options are stereolithography (SLA) and fused deposition modeling (FDM). Each has its strengths and weaknesses, and knowing these can help you decide which is best for your project.
Stereolithography (SLA) uses a laser to make liquid stuff hard. This method is known for its high precision and smooth surface finishes, making it great for detailed models. However, SLA printers and resins can be more expensive. They’re often used in industries where precision is crucial, like dental or jewelry model making.
On the other hand, Fused Deposition Modeling (FDM) melts plastic to build things layer by layer. FDM is generally more affordable and offers a wider range of materials. While it may not achieve the same level of detail as SLA, it’s perfect for larger models or when budget is a concern. FDM printers are commonly used for prototyping and general model building.
So, how do you choose between stereolithography vs fused deposition? It depends on your project’s needs. If you need intricate details and a smooth finish, SLA might be your best bet. But if you’re looking for a cost-effective solution for larger models, FDM could be the way to go. Understanding these technologies is a key step in making informed 3D printer model building recommendations.
The Importance of Enclosures in 3D Model Building
When you work on 3D printer model building, you might wonder why some printers have a box around them. This box is called an enclosure, and it can be a game-changer for your projects. Enclosures play a crucial role in maintaining print quality, ensuring safety, and keeping your printer running smoothly.
An enclosure for model building helps control the temperature around your printer. This is important because changes in temperature can affect how your 3D prints turn out. If your printer is in a cold or drafty room, the layers of your print might not stick together properly. With an enclosure, you can keep the temperature steady, leading to stronger and more accurate models.
Safety is another reason to consider an enclosure. When printers are running, they can get hot and make noise. An enclosure helps reduce noise and keeps curious fingers away from moving parts and hot surfaces. This makes your workspace safer, especially if kids or pets are around.
Besides temperature control and safety, enclosures can improve the overall quality of your prints. By reducing drafts and outside air exposure, enclosures help prevent issues like warping or curling. This means your models will have cleaner lines and look more professional. Enclosures are especially useful when you’re printing with materials that need precise temperature conditions, like ABS plastic.
In summary, using an enclosure for model building can significantly enhance your 3D printing experience. It ensures better print quality, enhances safety, and reduces noise. Whether you’re a beginner or an experienced maker, considering an enclosure for your 3D printer could be a smart move to improve your projects.
Techniques for Printing Models in Pieces
When you’re working on 3D printer model building, you might run into a problem: your model is too big for your printer! But don’t worry, there’s a solution called printing in pieces. This technique lets you create large models by breaking them down into smaller parts that fit your printer’s build space.
The first step in printing models in pieces is to plan your model carefully. You’ll need to use software to split your model into parts that can be printed separately. Programs like Tinkercad or Fusion 360 can help you do this. When dividing your model, think about how the pieces will fit together. Look for natural seams or edges in your design where pieces can connect smoothly.
Once you’ve split your model, think about how you’ll join the pieces after printing. You can use adhesives like super glue or epoxy to hold the parts together. Another option is to design connectors, such as pegs and holes, directly into your model. These connectors can help with alignment and ensure a snug fit between pieces.
As you print each piece, make sure to keep track of their orientation and any supports needed. Supports are extra structures printed to hold parts of your model during the build. Removing these carefully is crucial to keeping your pieces clean and ready for assembly. Also, remember to sand or smooth out any rough edges before putting your model together.
In conclusion, printing models in pieces is a handy technique that opens up new possibilities for 3D printer model building. By carefully designing and assembling your model, you can create large and complex shapes without being limited by your printer’s size. This method not only helps you tackle bigger projects but also enhances your skills as a maker.
Price Considerations for 3D Printing Projects
When embarking on a 3D printer model building project, understanding price considerations for 3D printing is crucial to staying within budget. Whether you’re a hobbyist or a professional, knowing the costs involved can help you make informed decisions and avoid surprises.
First, consider the upfront cost of the printer itself. Fused Deposition Modeling (FDM) printers are generally more affordable than Stereolithography (SLA) printers. FDM printers can be a great choice if you’re looking to save on initial expenses and are suitable for general model building. SLA printers, while pricier, offer higher precision and might be worth the investment for projects requiring intricate details.
Next, think about the cost of materials. FDM uses plastic filaments, which are often cheaper than the resins used in SLA. However, prices can vary based on the type of filament or resin you choose. Standard materials like PLA and ABS are cost-effective, while specialty filaments or resins may cost more. It’s important to factor in material costs when planning your project to ensure that you select the right balance between quality and budget.
Maintenance and electricity are other significant price considerations for 3D printing. Regular upkeep, like replacing parts or cleaning your printer, can add to your expenses over time. Additionally, running your printer consumes electricity, which can increase your utility bills. To minimize these costs, ensure your printer is well-maintained and consider energy-efficient models or settings.
To keep your budget in check, look for ways to reduce costs without compromising quality. Optimize your print settings to use less material and decrease print time. Also, consider buying materials in bulk or during sales to save money. Comparing the costs of SLA and FDM for your specific project needs can also help you decide which technology offers the best value.
In summary, by understanding the various price considerations for 3D printing, you can effectively budget for your model building projects. Weighing the costs of printers, materials, and maintenance will help you make smart choices and enjoy the creative process without breaking the bank.
Practical Tips for Successful 3D Model Building
Embarking on a 3D printer model building project? Here are some practical tips to ensure your creations turn out just right. Whether you’re a beginner or a seasoned maker, these insights can help you tackle common challenges and improve your models.
First, let’s talk about print settings. Optimizing your settings is key to successful 3D printer model building recommendations. Start with the basics: layer height, print speed, and temperature. A smaller layer height can give you more detail, but it takes longer to print. Adjust the speed to find a balance between quality and time. And don’t forget to calibrate your printer’s temperature according to the material you’re using. This can prevent issues like warping or poor adhesion.
Choosing the right materials is another crucial factor. Different projects require different materials. PLA is easy to use and great for beginners, while ABS is stronger but needs precise temperature control, often requiring an enclosure for model building. For more flexibility, try TPU, or if you need high detail, consider using resin for SLA printers. Always match your material choice to the demands of your project.
Post-processing can take your models to the next level. Once your print is done, you can sand or paint it to improve the finish. If you’re working with FDM prints, removing supports carefully is important to avoid damaging your model. For SLA prints, a thorough cleaning and curing process is necessary to achieve the best results. Experiment with different techniques to discover what works best for your designs.
Finally, don’t be afraid to experiment and iterate. 3D printing is as much about creativity as it is about precision. Test different designs, try new materials, and tweak settings to see how they affect your model. Each project is a learning opportunity, so embrace the process and enjoy the journey.
In conclusion, successful 3D model building involves understanding and optimizing print settings, selecting suitable materials, and using post-processing techniques. Remember, the best way to master 3D printing is through practice and experimentation. Keep these tips in mind, and you’ll be well on your way to creating amazing models.
Ready to start your next project? Visit MakerTechGuides for more tips and join our community of makers to share your creations and learn from others.